Character Design
This project begins with questions, What makes a hero and what makes a villain? Which would you be? Are you super? Male or Female? Do you have powers? Are you an Alien? Are you a genetically altered Hybrid human/animal? Are you a cyborg? Are you something else that can be classified as a hero or villain?
When you are brainstorming your characters anything goes, as the project is developed and skills are learned you will edit the list down. You have three options for your final project that allow for a variety of creativity and interests: from super heroes and villains to cultural relevant topics
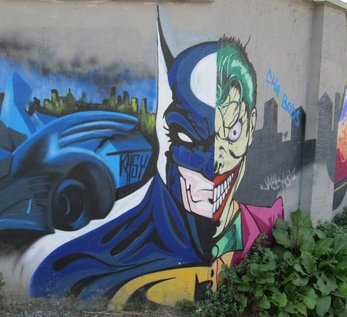
1. Create a portrait of your Hero or villain face
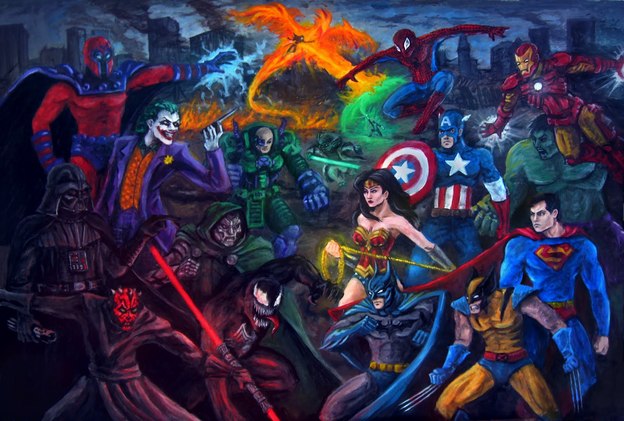
2. Create a full body action pose
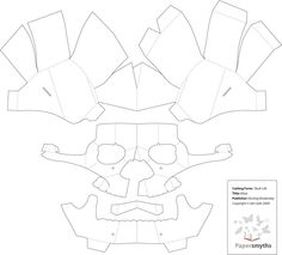
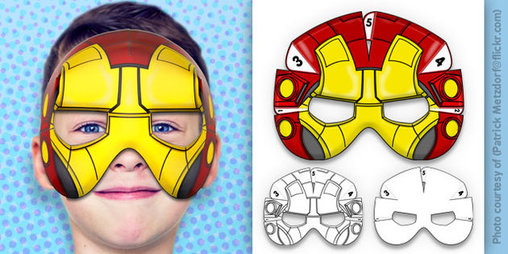
3. Create a 3-D mask
When you are brainstorming your characters anything goes, as the project is developed and skills are learned you will edit the list down. You have three options for your final project that allow for a variety of creativity and interests: from super heroes and villains to cultural relevant topics
1. Create a portrait of your Hero or villain face
2. Create a full body action pose
3. Create a 3-D mask
|
|
|
|
With the exception of the mask template the portrait of joker and batman as well as the multiple figures of superheroes and super-villians incorporate the background to add to the depth of the image. Even the color selection shows patterns in already existing heroes and villains. The mask template would need some design element, for example: Day of the dead design.
Hero/Villain brainstorming reference.
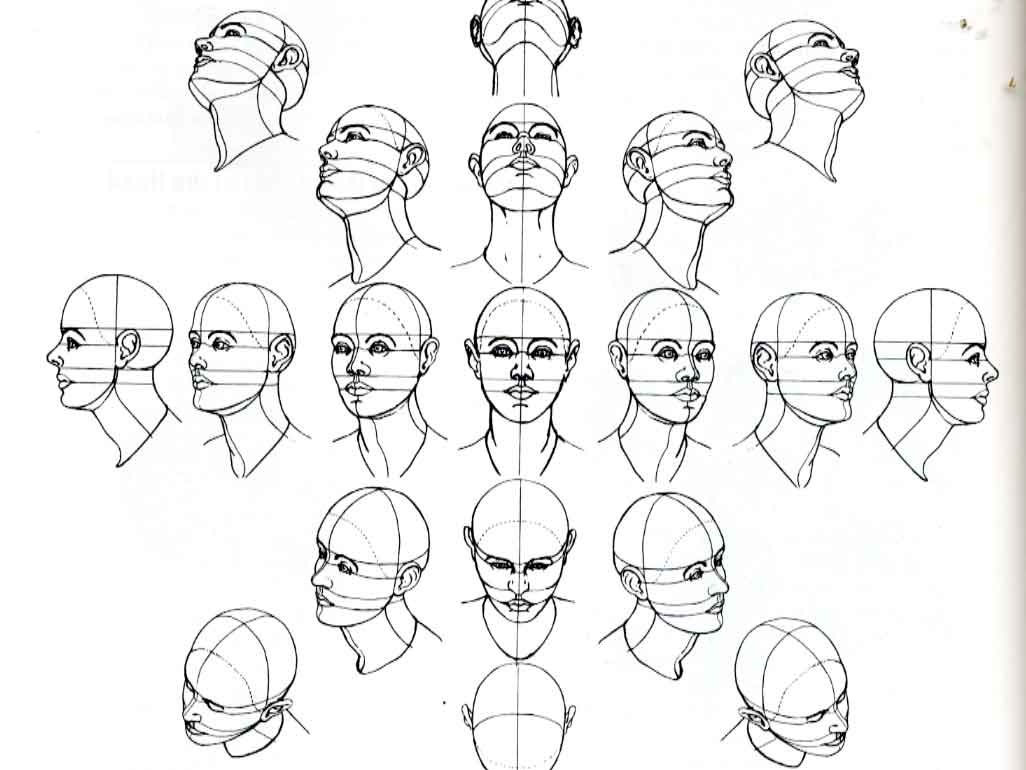
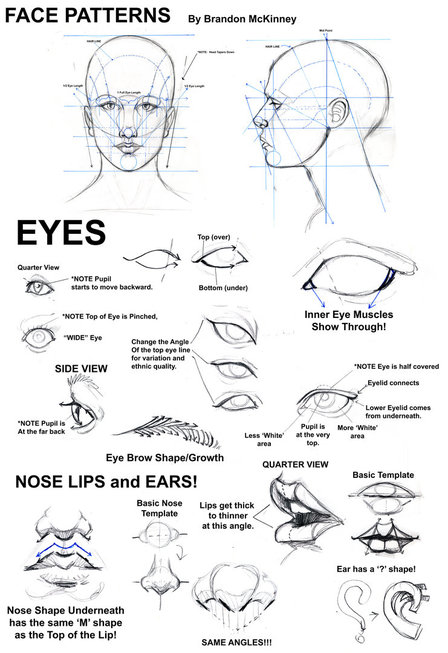
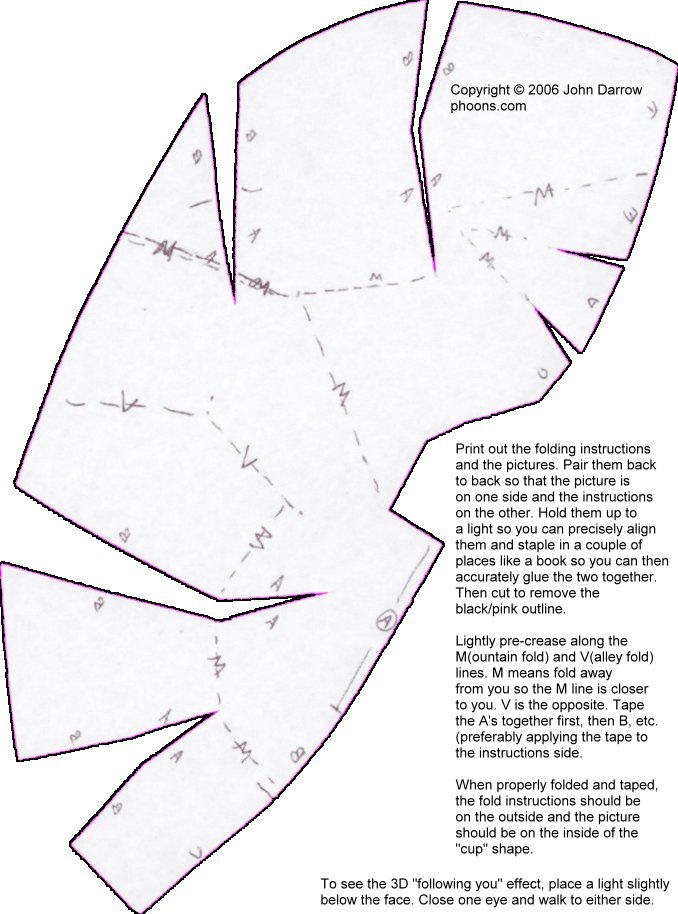
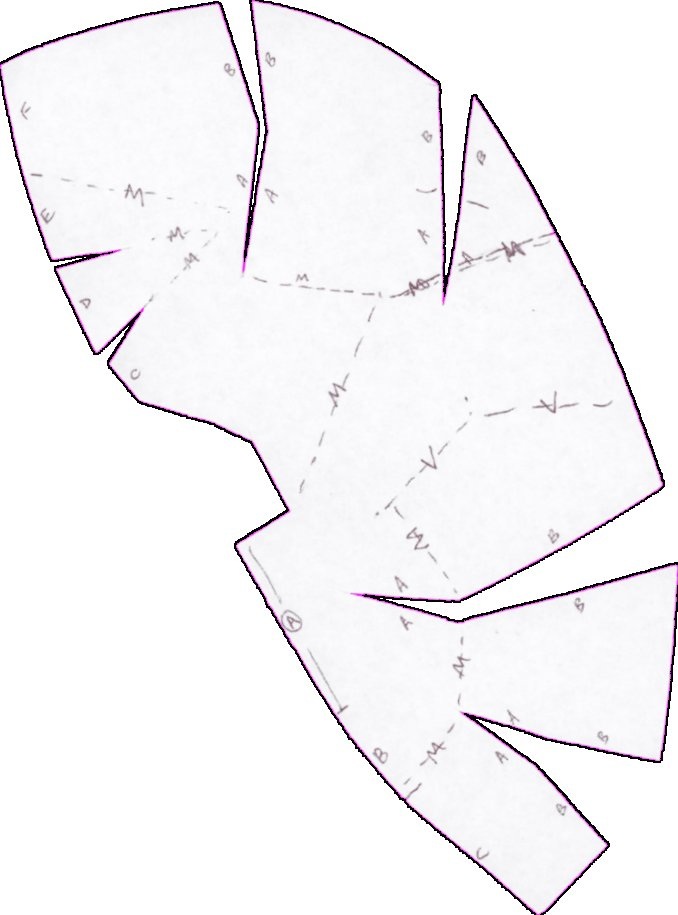
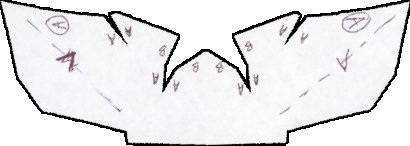
During class I demonstrated three different techniques that assisted in the development of each option; generic face proportions using only lines and circles, Gesture drawing using circles and lines, and using a template to create a 3-D mask from a 2-D material.
During the face proportions the lines and circles represent place holders and organizational lines to determine proper placement of the face features: eyes, nose, mouth, and hair line.
Hero/Villain brainstorming reference.
During class I demonstrated three different techniques that assisted in the development of each option; generic face proportions using only lines and circles, Gesture drawing using circles and lines, and using a template to create a 3-D mask from a 2-D material.
During the face proportions the lines and circles represent place holders and organizational lines to determine proper placement of the face features: eyes, nose, mouth, and hair line.
|
|
|
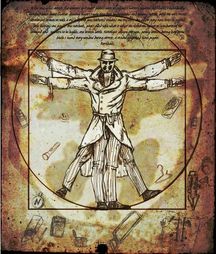
The second of the in class demonstrations had to do with general proportions of the figure and how to make a gesture drawing. A gesture drawing is a quick sketch that captures the movement of a figure or pose. We began by talking about general proportions of the figure. The two images below display some of these general rules that will get you in the ballpark of a proportional human.
The first image references Leonardo Da Vinci's Vitruvian man asa well as the character from The Watchman name Rorschach which references a psychological test known as the inkblot test. The perfect square and the perfect circle show how the body works together. The second image shows how the figure is 7.5- 8 head lengths tall and what parts of the body fall at each head.
Links for figures posing.
*these links have images of nude models, make sure you are clicking on the "decent" model or "clothed" also choose the class mode 30 minute trainer or 30 second. Choose "clothed" Choose only "decent" and "class mode, 30 minute trainer" 3-D Mask from 2-D template
|
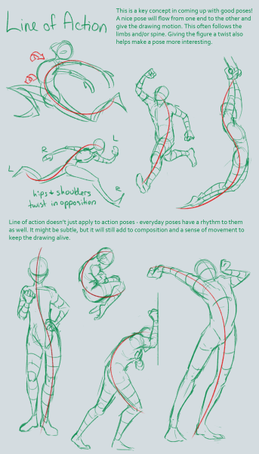
Once an understanding of placement of body sections in comparison to the head size is clear scholars can begin to draw their gestures.
1. Draw the action line (red line in the image above) 2. draw a circle to represent the head, hands, and joints. 3. draw a triangle connecting the shoulders to the belly button as well as the hips to the belly button. 4. Draw a triangle to represent the placement of the ankles and soles of the feet. 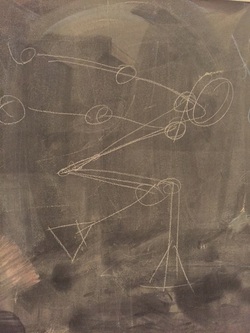
|

| h-v_assessment.docx |
